Showing posts with label summer minibook. Show all posts

Tuesday, July 8, 2014

Fire Memory Keeping | a look back

I am part of a great community of women that are all wives, fiancees, and girlfriends of wildland firefighters. Last week, we were on the topic of documenting and/or scrapbooking the fires our husbands have done. As a result, I thought it would be fun to share what I have done in the past since most of my documentation is currently going into my Project Life albums (as shown here).

When I shared my Project Life pages with the ladies, some of them commented that they weren't so creative. Today, I am sharing pages from my 2011 Summer Minibook where my fire documentation was simply a 4x6 piece of card stock, photos, some markers, and letter stickers.
As you can see above, so very straightforward. There were a few photo collages made using PhotoShop that could easily be made using something like PicMonkey.com to get the same effect. If the photo wasn't a full 4x6, I just added it to a piece of patterned paper or card stock. 
Besides just writing about specific fire assignments, I also added in a plane ticket from his return flight from Texas, a few crew photos, an overview of his job on an Engine (first season on an engine), a map, and an envelope with letters. On the flap of the envelope is a chronological list of the names and dates of all the fires he was on that season.

So easy, and straightforward! I realize many of you aren't married to Firefighters but this approach can be used for any trip or event. You don't have to have the latest gadgets and products, spend a ton on supplies, or be the best photographer. Just jotting down your memories, and sharing your photos and memorabilia will make any project special!

Going back through that album for this post was so great. I loved the quirkiness of it. It also renewed my creativity for my Project Life albums. I am looking forward to incorporating some of those ideas into my bigger album. It was also a chance for me to see that I need to go back again and fix some posts that have broken links!

Monday, September 26, 2011

Summer Mini Book Progress #6

I realize I am still barely breaking through July with these posts. I have so many things I want to get into these posts and the book, but I have no time. It has taken me FOREVER!

When the boys and Maggie got back from the Wallow, we celebrated the Fourth of July with a BBQ. I did a currently post that I ran through the printer. Facing it are some pictures of the day. The background was painted with some "metallic" red, white, and blue paints.

I backed the photos with a small calendar page that keeps track of my goals and happenings throughout the month. Facing that is a page I made using PS about our second try up Mnt Elden. The pictures were added in the same manner as a photo grid. I left the background plain photo paper and used the space for journaling. I just used a ZIG scrapbooking pen to write on the paper.

The back of the Mnt Elden page is another photo grid type page. Three photos from food we tried during "Date Week". Next to each photo is the name of the dish. In the center is the coaster from Rendezvous in the Hotel Monte Vista. I used a regular hole punch to make holes for the raffia to run through. On the back of the coaster I journalled some more about that week. Under that is a page talking about my summer goals. I just ran it through the printer.

Monday, September 19, 2011

Summer Mini Book Progress #5

My fourth summer goal was to make progress on my Flagstaff Bucket List. I looked up a lot of their logos and used Photoshop to layer them all. I used a gradient fill for the background and I tried to pick colors that matched the back of the teal textured paper. Nate and Jayde had a BBQ Badminton party and I used the pictures for another photo grid.
The back of the Badminton photogrid, I did another photogrid with text. I just added the pictures of BK from the Wallow Fire along with the description and the devastation it caused. I had a few typos so to make them less obvious I wrote over some of the pre-printed text with an orange sharpie. Facing it was another photogrid from a Doggy Birthday Party!
This spread is from the First Friday Artwalk in July. It was my first time going to artwalk. I had a blast. This group of people is amazing to hang out with. For some reason when I printed it the far left edge didnt print at first. It threw the dynamics and dimensions off. Thankfully, the blank photo paper edge allowed room for some journalling. On the other hand, the shift resulted in me inadvertently punching my face out. Everything else was fine though!

Monday, September 12, 2011

Summer Mini Book Progress #4

I have been slacking on posting these updates!

The back of the fruit page I did some journaling about the events of the past few weeks which were in the previous pages. I moved this iridescent heart page up. I like the similar colors together.
The back of the heart page I printed a graphic of a poem I love. The 16th of June is our anniversary so the inner piece is the tag from a pair of hiking knickers I bought as BK's gift. The lace trim is from a skirt I made for our anniversary. Behind the tag is the back side of a textured paper. I added a graphic of an artichoke since that was what we had for dinner that night.
On the front of the page, I added a picture of Berkeley on a fire since he left 2 days after our anniversary for another dispatch. Facing it, I printed the general overview of Berkeley's job on the pea green/yellow scalloped page. I set up the text in Photoshop and then ran the page through.
On the back of the scalloped page I adhered a fire map of the Wallow Fire from the day Berkeley arrived there. Opposite was an experiment type page. The orange squiggle page came with the book. I printed some journaling on raspberry cardstock then adhered that to the page. To add another layer of detail, I made a plastic sleeve type thing based off of one of Elise's tutorials.
The back of the orange page was just plain white and I was having trouble figuring out what to put on there. Then another summer goal presented itself. I added some photos on there and hand wrote the titles this time instead of photoshopping it on. Afterward I trimmed the page down to fit inside the plastic and sewed it shut. On the teal textured page I just journaled using an opaque scrapbooking pen. The little tab is from a second book I bought from Elise. Stay tuned next week for some more updates!

Monday, July 18, 2011

Summer Mini Book Progress #3

It has been roughly a month since the last mini book update. Even though I haven't posted the updates here, I have been busy on the book. I am at about 20 pages now. It is really capturing a bulk of what has been happening this summer.

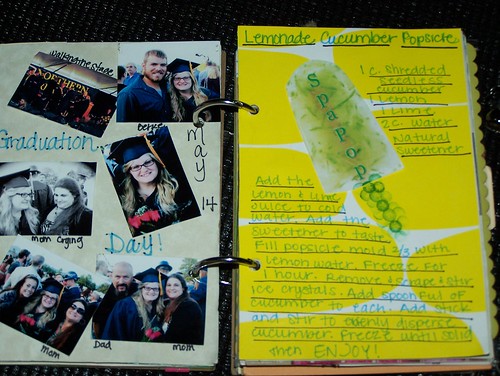
Since the last update, I have rearranged a few of the pages. First I added photos from Graduation to the back of the invite/announcement page. These pictures I just printed as a "Contact" sheet. I played with arrangement until I liked the look. After adhering them to the page, there was something missing. I added the writing and other details. I like how it has the traditional "scrapbook page" look to it.

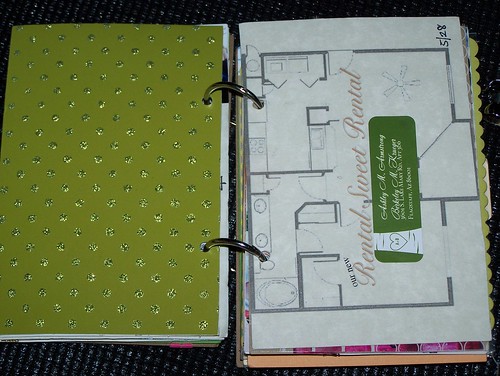
In the first arrangement, I had the graduation pictures facing the page of the floor plan of the new apartment. Now it is facing a page that has a recipe of my new favorite treat: Spa Pops! I printed out the photo of the popsicle. To take it up a notch, I used green stamping ink to make the "stick" of the popsicle. Since there was already enough green, I wrote out the recipe around the photo in a blue scrapbooking pen and underlined it in black to make it stand out. The recipe was backed with a lime green paper with glitter spots.As seen above, the green page faces the layout page. To make it match a little bit better, I added one of our new address labels. The back of that is still our moving announcements. A little redundant, but I love all the different colors and patterns of the announcement. Plus the picture is one of my faves of us even though it isn't a "summer" picture. That announcement doesn't face the Zambonini page anymore either.
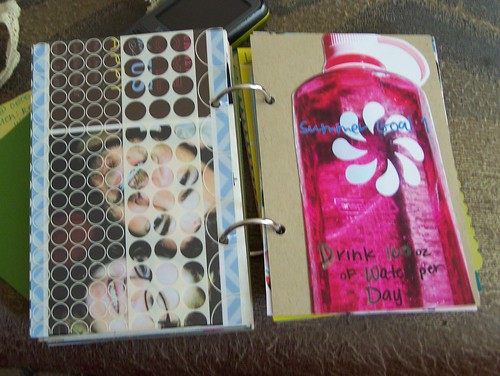
I added one of the transparent pages between the announcement and my first Summer Goal page. I printed out a closeup photo of my new Nalgene, with "Summer Goal 1" photoshopped onto it. I cut it out and placed it on the plain brown backside of one of the grid pages. I wrote on it with a plain black Sharpie. Lastly, I wrote over some of the letters with a silver Sharpie. The back of that page is some journaling and faces the Zambonini photo grid.
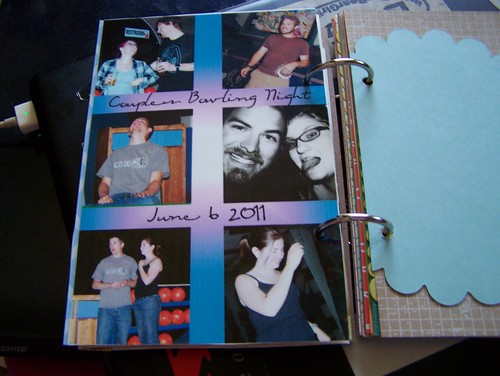
The back of the Zambonini photo grid is another one from Couples Bowling Night! Instead of a plain background for the grid, I used a gradient background fill. It was a good night! Not sure if I linked to it or not, but I followed Elise Joy's video tutorial to make these photo grids. I'd also like to note this is the same place that I got my summer mini book.
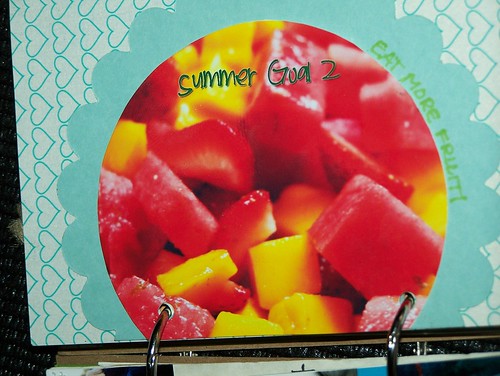
Facing the bowling photo grid is the scalloped page. To be honest, I was a little nervous to use it. After making a goal to eat more fruit, I used a nice photo of a fruit salad on the front of the scallop. Once again I used Photoshop to add the text to the photo. To make the circle, I started with canvas the size of the diameter of the circle I want. Similar to the tutorial for making a photo grid, I just made a circle on the canvas, layered the photo on top and created a clipping mask so that it was round. It was really easy!

That is it for Minibook pages for now. Now it is just time to figure out the camera situation so I can get more photos up here. If you are interested in purchasing your own summer minibook check out her shop on Etsy! Her blog is filled with all sorts of great posts including tips and ideas for your minibook.

Friday, June 10, 2011

Summer Mini Book Progress #2

Continuing with the minibook, I copied one of Elise's pages and used the spiral clip to hold in a greeting card. It was a little bit larger than the 4x6 page, so I trimmed it down and adhered it to the page so that it would slide over the rings better. The next page was a little bit more interesting and I really have no clue how I came up with it.

Before graduation, a company sent me a sample graduation announcement. It had been floating around the apartment and since it is what I based my DIY announcements on, I figured it could be used. At first glance, it looks like just an invitation of some sort. Then you open it up and voila, there will be one of the professional photos from graduation put in there.

It was a tri-fold card, but it was too long to mount on a page. I cut a piece from the middle of the back and attached them around a paper from further back in the book. Not only does the colored paper add another fun element to the serious look of the announcement, it covers the sample text down the middle. The text continued on the bottom flap. Instead of finding more paper to cover it, I wrote up a "currently" post for everything I was experiencing from graduation and attached it to the bottom flap.

The text of the "currently" post can be found in this blog post. I laid it out in Photoshop for a width of 3 inches and a length of 6 inches to fit in the flap. Used the same dark blue as the outside text of the announcement. For the date, I used a color that matched the background of the paper for the center that the photo will be attached to. Lastly, to fill the weird void in the crease, I added more gold glitter tape. It mimicked the gold of the announcement.

The back of this page has yet to be finished, but I think I will make a collage of the photos from either graduation with family or photos from the move since the fourth page is the layout of our new apartment.

The picture came from the info booklet form the rental office. I scanned it and uploaded it to Photoshop. From there I flipped the image so that it matched our layout exactly. At first it had labels on each of the spaces. I didn't like it so I removed those and added the text shown. I then printed it on some textured paper. Lastly, I cut it down to 4x6 and punched holes in it.

The back of page 4 was a great photo of us! Haha. We ordered some Shutterfly change of address announcements. They came in a weird size like 4x9 or something rather large. I used an extra, and cut it down to size. I like the photo a lot (even though it isnt from summer) and figured, I know my own address so I took most of the extra off the text side.

Page 5 is just another photo grid made in Photoshop. I used some of my favorite photos from our tee ball outings with The Zambonini family. Six eqaul size photos with a gray background. I used a downloaded font and wrote the title of the page. I am sure there will be more of these "Hanging with The Zamboninis" layouts because they are a couple in our age group. Each one, I plan on changing up a little here and there. I just printed these grids on regular photo paper for my printer. I have a few other random pages made up but there isnt any particular order for these pages.

Summer Mini Book Progress #1

So, if you follow me on Facebook you may have noticed that I have been working on a Summer Minibook. Elise Joy on etsy sells these collections of books on binder rings composed of papers of all different styles, shapes, sizes and colors. These are a great little books to aide in memory keeping and scrapbooking. Last month, Elise unveiled her Summer 2011 mini book along with tutorials and blog posts on how she is updating her own book.

I spent a few weeks fawning over these books. I have never been a scrapper so I was alittle apprehensive about purchasing one of these little guys. After seen Elise work through her book, I felt the need to buy one of my own. So I bought one! Yay! And terror!

When this little beauty came, we were in the middle of our move but I was brimming with ideas. Since most of my crafting supplies were packed up I added a simple length of ribbon down the length of the cover. First, I adhered the ribbon using an adhesive roller, and then secured it with two staples. The first page was a smaller blank white piece of cardstock. I used this piece as an experimental page.

First I practiced writing out my journaling for this page, then started on the page for the book when I had all of my words figured out. Its positioning was a little weird so I added some other elements to the page. First was one of my favorite summer quotes added to the edge. The two text sections were separated by a piece of scrap fabric.

The back of the first page was something that I thought of after doing the second page. Elise had given a series of video tutorials on some of the elements she has used in her book. My favorite was how to use PSE to make a photogrid. Following her direction, I made a few including one of BK's photos from the Texas fires. I made it smaller than the 4x6 page and then added it to the green cardstock using roller adhesive.

To make it more cohesive, I added one of Berke's boarding passes from his trip back to AZ on the back of the first page. I thought I would use some stitching to add some different detail. Well my sewing machine isn't feeling happy with the change in material from fabric to paper. The first stitch line went fine. I decided to step it up and use a zigzag. It got a little funky/messy at the end, but it wasn't too bad. It added a little bit of personality. I fixed the tension and bobbin (I thought) and tried another zigzag stitch on the very outside edge of the page. My machine DID NOT like that stitch and ate the bobbin thread!

That stitch and my hungry machine mauled the edge of the page and looked grotesque. I panicked and couldn't think of a way to cover up this nasty looking mess of ripped up cardstock and tangled thread. Then I came across my gold glitter tape! It covered everything nicely. It also tied all of the colors between the first two pages together. To me it gave a polished and finished look to both sides of the first page while keeping it fun and covering the mistakes.