
Since the last update, I have rearranged a few of the pages. First I added photos from Graduation to the back of the invite/announcement page. These pictures I just printed as a "Contact" sheet. I played with arrangement until I liked the look. After adhering them to the page, there was something missing. I added the writing and other details. I like how it has the traditional "scrapbook page" look to it.
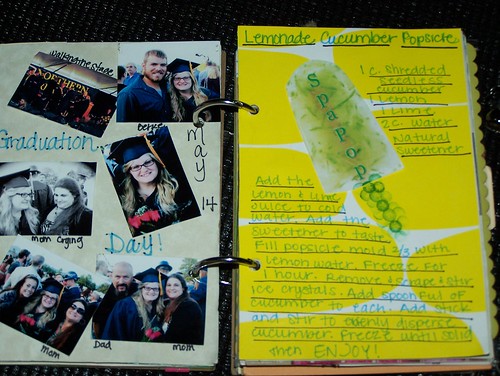 In the first arrangement, I had the graduation pictures facing the page of the floor plan of the new apartment. Now it is facing a page that has a recipe of my new favorite treat: Spa Pops! I printed out the photo of the popsicle. To take it up a notch, I used green stamping ink to make the "stick" of the popsicle. Since there was already enough green, I wrote out the recipe around the photo in a blue scrapbooking pen and underlined it in black to make it stand out. The recipe was backed with a lime green paper with glitter spots.
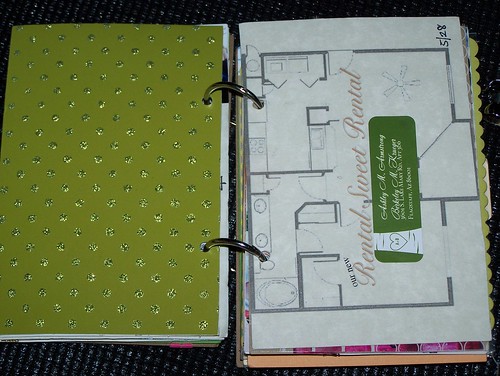 As seen above, the green page faces the layout page. To make it match a little bit better, I added one of our new address labels. The back of that is still our moving announcements. A little redundant, but I love all the different colors and patterns of the announcement. Plus the picture is one of my faves of us even though it isn't a "summer" picture. That announcement doesn't face the Zambonini page anymore either.
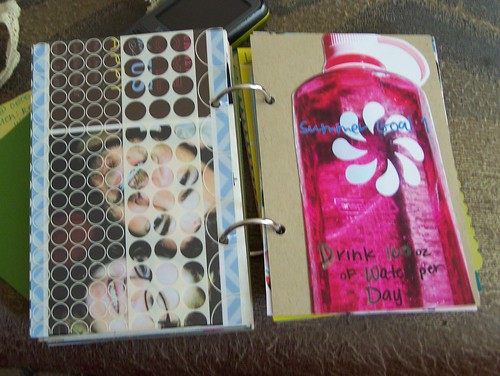 I added one of the transparent pages between the announcement and my first Summer Goal page. I printed out a closeup photo of my new Nalgene, with "Summer Goal 1" photoshopped onto it. I cut it out and placed it on the plain brown backside of one of the grid pages. I wrote on it with a plain black Sharpie. Lastly, I wrote over some of the letters with a silver Sharpie. The back of that page is some journaling and faces the Zambonini photo grid.
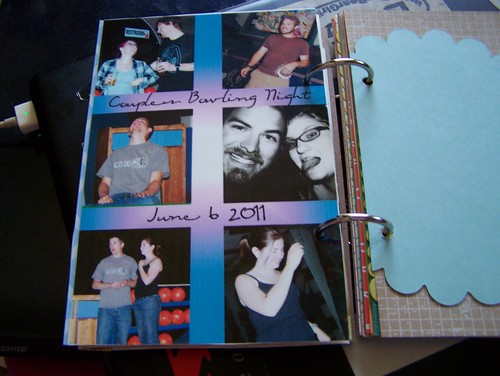 The back of the Zambonini photo grid is another one from Couples Bowling Night! Instead of a plain background for the grid, I used a gradient background fill. It was a good night! Not sure if I linked to it or not, but I followed Elise Joy's video tutorial to make these photo grids. I'd also like to note this is the same place that I got my summer mini book.
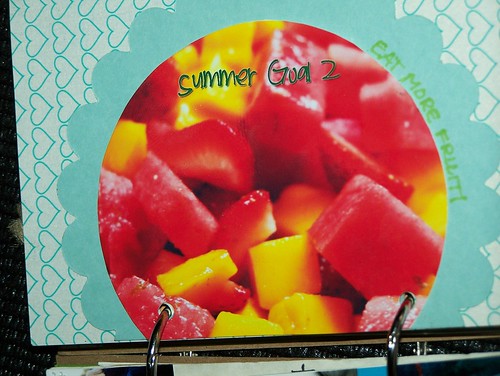 Facing the bowling photo grid is the scalloped page. To be honest, I was a little nervous to use it. After making a goal to eat more fruit, I used a nice photo of a fruit salad on the front of the scallop. Once again I used Photoshop to add the text to the photo. To make the circle, I started with canvas the size of the diameter of the circle I want. Similar to the tutorial for making a photo grid, I just made a circle on the canvas, layered the photo on top and created a clipping mask so that it was round. It was really easy!
That is it for Minibook pages for now. Now it is just time to figure out the camera situation so I can get more photos up here. If you are interested in purchasing your own summer minibook check out her shop on Etsy! Her blog is filled with all sorts of great posts including tips and ideas for your minibook.
No comments:
Post a Comment